Duct Tape Pen Pouch

Duct Tape Pen Pouch

Hola! Today’s craft is a duct tape pen pouch, made out of a regular snack bag. You can also use this pouch to store other supplies, like scissors or washi tape. I’m not including a collage, because I think the craft is mostly self-explanatory; however, if you are confused about any steps, fell free to ask any questions in the comments section.

Materials:

Duct tape

Plastic snack bag

Scissors

1. Cover the bag in duct tape below the zipper.

2. Trim the edges. Don’t cut too close to the bag; it is better to have duct tape hanging evenly off the side than to cut the bag open.

Make sure to check out Duct Tape Doodles on PinterestBloglovin’ and Google Plus!

Have a great day 🙂

Washi Tape Garland

washi tape garland

Hey everyone! Today’s craft is a super cute washi tape garland! These garlands are highly popular on Pinterest, so I decided to try them out. The craft is simple and quick, but is a great way to decorate walls, bulletin boards, birthday cards, and so much more. Here’s my tutorial:

washi tape garland

Materials:

Washi tape

Twine

Scissors

1. Wrap equally spaced pieces of tape around the twine.

2. Trim the tape pieces to your desired size and shape. To make sure all of my flags looked the same, I cut one piece to the correct shape, then placed it over the other flags so I could “trace” with scissors.

3. Hang your garland! I hung my garland with washi tape, but you could also use pushpins on a bulletin board.

That’s all!

If you haven’t done so already, follow Duct Tape Doodles on PinterestBloglovin’ and Google Plus!

Have a great day 🙂

Washi Tape Corner Bookmark

washi tape corner bookmark

Happy Earth Day! Today, after much “Pinspiration,” I created my first corner bookmark! The advantage of a corner bookmark is that it does not stick out of books, making it less easily bent and torn. Creating the bookmark is simple and quick. Of course, it’s green and brown, in honor of our fantastic Earth!

Corner bookmark instructions

Materials:

6″ by 6″ piece of cardstock

Pencil

Scissors

Ruler

Glue

Paintbrush

Washi tape

1. In pencil, lightly divide the cardstock into four equal squares (I darkened the lines in the picture to make it easier to see.)

2. Divide two opposite squares diagonally, as the picture shows.

3. Cut off two outer triangles and one square. Again, use the picture for reference.

4. Fold both triangles on top of the square. Using the paintbrush, spread a thin layer of glue over only the top of the bottom triangle. Then, press the top triangle over the bottom triangle. Don’t glue the square!

5. Cover in washi tape.

That’s all! If one bookmark just isn’t enough, try making a Duct Tape Fall Bookmark or the “It’s Rough” Duct Tape Bookmark. If you prefer reading on your kindle, make sure your e-reader has a stylish case!

Also, you should definitely check out this post on Caution District for tips on making Earth a cleaner planet.

Don’t forget to follow Duct Tape Doodles on PinterestBloglovin’ and Google Plus!

Have a great day 🙂

Duct Tape Desk Organizer

 Dut Tape Desk Organizer

Happy spring! I’m so excited to share today’s project, mostly because I’m OBSESSED with my new duct tape! I found the pattern on sale at Office Max last weekend. The design is called “Paisley Princess,” and comes in two colors: pink and purple. The tape is actually Scotch brand, not Duck brand, but I haven’t noticed any major differences between the two companies. I have to say, Paisley Princess is probably the prettiest duct tape I’ve owned. EVER. (Can you tell how excited I am?)

Anyway, I like this desk organizer because it’s affordable to create; I used old toilet paper and paper towel rolls. Here’s how I made it:

Duct Tape Desk Organizer Instructions

Duct Tape Desk Organizer

Materials:

4 toilet paper tubes, cut to different heights

Duct Tape

Cardstock

Mod Podge (please don’t call it “Modge Podge,” or I’ll cry)

Scissors

Paintbrush

1. Cover all of the toilet paper tubes in duct tape. Only cover the sides; don’t tape over the top and bottom.

2. Arrange the toilet paper tubes in a square, and wrap a piece of tape around them to hold them in place.

3. Use the Mod Podge and paintbrush to attach the bottom of your desk organizer to the cardstock, and let dry. Use a lot of Mod Podge! As you can see in the picture, I really piled it up around the edges. My organizer needed to dry overnight.

4. Use scissors to trim around the base of your organizer.

That’s it! The container is super sturdy and convenient, and a great place to keep your Duct Tape Rose Pen or Washi Tape Pencils. Just saying.

I hope everyone has a great week! Make sure to follow Duct Tape Doodles on Pinterest, Bloglovin’ and Google Plus! See you next time 🙂

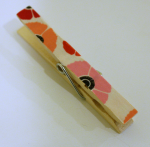
Easy Washi Tape Clothespins

COVER

Happy February! To celebrate the new month, here are some easy DIY Valentine’s Day clothespins. I like that this craft is very quick but still cute. 🙂

You need:

Red and pink washi tape

Clothespins

X-acto knife

1. Lay a clothespin on a slightly longer piece of washi tape.

step1

2. Trim excess tape.

step2

3. Repeat on the other side of the clothespin.

And that’s it! You can create about 10 clothespins in half an hour. Once you get the hang of making them, it’s hard to stop!

Finally, I’d like to give a shoutout to one of my favorite blogs, Caution District. Asya is a teenage blogger who posts consistently (unlike me) with advice, musings, reviews, and my personal favorite, workouts. I definitely recommend checking out her blog!

Screen Shot 2015-02-03 at 12.43.57 PM

Have a great rest of the week! ❤

Duct Tape Winter Portable Speakers

COVER

Wow. It has DEFINITELY been awhile. And all I can say for myself is: 1. School and sports are INSANE. 2. Happy Halloween, Thanksgiving, holidays, and New Year! If you live in New England like me, you probably got hit by a MASSIVE snow storm today, which forced activities to be cancelled, and left time to catch up on blogging! Anyway, to keep with the winter theme, I made this blue and white portable speaker, inspired by this post, which I discovered on Pinterest (make sure to follow Duct Tape Doodles)! I know this isn’t exactly high-tech, but it’s cheap, convenient, and doesn’t require electricity, so it makes a great temporary solution. The ducks agree. Here’s how I made the speakers:

COLLAGE

Duct Tape Portable Speakers

Materials:

Blue duct tape

1 Toilet paper tube

Cell phone or MP3 player

Paint sharpie

X-acto knife

4 Matching pushpins

Pencil

1. Using the pencil, trace the bottom of your device onto the toilet paper tube. If you usually use a case, leave it on for this step.

2. Use the X-acto knife to cut out the shape you just traced. MAKE SURE YOUR DEVICE FITS SNUGLY IN THE HOLE.

3. Cover the ENTIRE toilet paper roll in duct tape. You can tape right over the hole.

4. Cut an “X” shape across the hole with the X-acto knife. I drew in the “X” in the collage for you to see, but you can just go ahead and cut it.

5. Fold the triangles created by the “X” into the tube so they cannot be seen.

6. Decorate the speakers with the paint sharpie! You may need to use 2 coats.

7. Insert the pushpins so that the speakers can stand up. This took me a couple of tries. WARNING: THESE SPEAKERS SHOULD NOT BE USED BY SMALL CHILDREN AS THEY COULD BE INJURED BY THE PUSH PINS. ALWAYS BE CAREFUL WHEN USING THESE SPEAKERS.

8. Insert your device and play some music!

I tested these speakers and found that they actually do nicely enhance the sound. I was pleasantly surprised :). After making these speakers, try making a washi tape charger too! Thank you to everyone who stuck with me through my frustrating absence. I missed you! Hopefully I’ll be back soon. Have a great rest of the week! ❤

Toilet Roll and Washi Tape Gift Box (Pillow Box)

Toilet Roll and Washi Tape Gift BoxGuess who got new washi tape! I picked up a cute flower print at Office Max and I’m definitely obsessed. It’s Scotch Expressions Washi Tape, and the pattern is called “Poppy.” You can get your own here! Anyway, with this FABULOUS new tape, I created a cute little pillow box! These boxes are absolutely great and can be filled with jewelry, wrapped candy, or any other small gift. Here’s the tutorial:

Washi Tape Box Collage


Materials: 

Toilet Paper Roll

Washi Tape

White Acrylic Paint

Paintbush

Scissors

1. Paint the toilet paper roll white. Use enough paint to cover the whole thing, but don’t use too much (so the box won’t get soggy).

2. Let the toilet paper roll sit until it is completely dry.

3. Decorate the roll with washi tape!

4. Pop the ends of the roll in to form a box shape.

That’s it! Have a fantastic week everyone :).